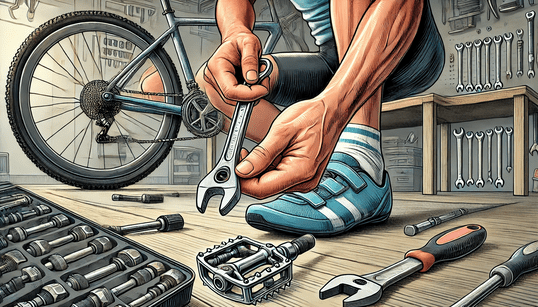
Knowing how to remove bicycle pedals is an essential skill for any cyclist. Whether you’re upgrading your pedals, performing maintenance, or preparing your bike for transport, this guide will walk you through the process step-by-step. We’ll cover everything from understanding pedal types to troubleshooting common issues.
Understanding Bike Pedals
Before we dive into the removal process, it’s crucial to understand the basics of bicycle pedals.
Types of Pedals
- Flat pedals: Simple platforms, great for beginners
- Clipless pedals: Require special shoes, preferred by experienced cyclists
- Toe clip pedals: A middle ground between flat and clipless
Pedal Threading Basics
One of the most important things to remember is that pedals have different threading on each side of the bike:
- Right pedal: Standard right-hand thread (tighten clockwise, loosen counterclockwise)
- Left pedal: Reverse-threaded (tighten counterclockwise, loosen clockwise)
This design prevents pedals from loosening as you cycle.
Tools and Techniques for Changing Bike Pedals

To remove pedals effectively, you’ll need the right tools:
- Pedal wrench: A specialized tool with a thin profile to fit between the pedal and crank arm
- Allen key or hex wrench: Some pedals have a hex fitting at the end of the spindle
- Lubricant: Penetrating oil can help loosen stubborn pedals
- Optional: Long-handled wrench for extra leverage
| Tool | Use Case |
|---|---|
| 15mm pedal wrench | The most common size for pedal removal |
| 6mm or 8mm hex wrench | For pedals with hex fittings |
| Torque wrench | For precise tightening when installing new pedals |
Preparation Steps
Before you start to remove the pedal, follow these preparation steps:
- Clean the pedal area thoroughly
- Position your bike in a stand or flip it upside down
- Identify the left and right pedals
- Shift the chain to the largest chainring for better access
Step-by-Step Guide: How to Remove Bicycle Pedals
Now, let’s go through the process of removing your bike pedals:
- Locate the wrench flats: Find the flat surfaces on the pedal for your wrench or the hex fitting at the end of the spindle.
- Position the wrench: Place your pedal wrench or hex wrench on the flats or in the fitting.
- Apply force in the correct direction:
- For the right pedal: Turn counterclockwise
- For the left pedal: Turn clockwise
- Loosen the pedal: Apply steady pressure to break the initial resistance. If it’s stubborn, you may need to use a longer wrench for more leverage.
- Remove the pedal: Once loosened, you should be able to remove the pedal by hand.
- Repeat for the other side: Remember to switch directions for the other pedal.
Using a Pedal Wrench to Remove Pedals
A pedal wrench is often the best tool for the job:
- Position the wrench so it’s parallel to the crank arm
- Push down on the wrench handle, keeping it close to the crank to avoid slipping
- Use your body weight for extra leverage if needed
Loosening Pedal Threads
If your pedals are stuck, try these techniques:
- Apply penetrating oil to the threads and let it sit for a few hours
- Use a rubber mallet to gently tap the wrench, helping to break the pedal free
- For extremely stuck pedals, you might need to apply heat to the crank arm to cause thermal expansion
Applying the Right Technique to Remove Stuck Pedals
Dealing with stuck pedals can be frustrating. Here’s a step-by-step approach:
- Apply penetrating oil and let it sit overnight
- Use the longest wrench you have for maximum leverage
- Position the bike so you can push down on the wrench with your full body weight
- If it still won’t budge, consider seeking professional help to avoid damaging your bike
Troubleshooting Common Issues
Here are some common problems you might encounter:
- Stripped threads: If the threads are damaged, you may need to replace the crank arm or use a thread repair kit
- Wrench slipping: Ensure you’re using the correct size wrench and that it’s fully engaged with the pedal
- Rusted components: Apply penetrating oil and let it sit before attempting removal
Installing New Pedals
Once you’ve successfully removed your old pedals, here’s how to install new ones:
- Clean the threads on the crank arm and new pedal
- Apply a thin layer of grease to the threads
- Start threading the pedal by hand to avoid cross-threading
- Use your wrench to fully tighten the pedal
Importance of Properly Tightening Bicycle Pedals
Proper torque is crucial when installing pedals:
- Under-tightened pedals can work loose while riding
- Over-tightened pedals can damage the threads or make future removal difficult
Use a torque wrench to ensure you’re applying the correct force. Most pedals require between 30-40 Nm of torque.
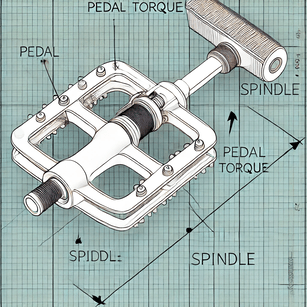
Understanding the Relation Between Pedal Torque and Spindle
The pedal spindle is the axle that connects the pedal to the crank arm. Proper torque ensures:
- The spindle doesn’t work loose during rides
- The threads on both the spindle and crank arm are protected from wear

Using a 15mm Pedal Wrench to Secure Pedals in Place
A 15mm pedal wrench is the most common tool for installing pedals:
- Thread the pedal in by hand as far as you can
- Use the 15mm pedal wrench to fully tighten the pedal
- Aim for a firm tightness, but don’t overdo it
Common Mistakes When Dealing with Pedal Replacement
Avoid these common errors:
- Confusing left and right pedals
- Cross-threading the pedal
- Forgetting to grease the threads
- Using the wrong size wrench
- Over-tightening the pedals
Issues that Arise from Incorrectly Tightening Pedals
Improper installation can lead to:
- Pedal wobble
- Creaking noises while riding
- Premature wear of pedal threads and crank arms
- Difficulty removing the pedal in the future
Choosing New Pedals
When selecting new pedals, consider:
- Your riding style (road bike vs. mountain bike)
- Compatibility with your shoes (for clipless systems)
- Weight and durability
- Brand reputation (Shimano is a popular choice)
Maintaining Your Bike Pedals
Regular maintenance can prevent many issues:
- Clean your pedals after muddy rides
- Check for play or wobble in the pedal spindle
- Periodically remove and regrease the threads
- Inspect cleats (for clipless pedals) and replace them when worn
When to Seek Professional Help
While removing and replacing pedals is generally a DIY task, there are times when professional help is advisable:
- If you’re uncomfortable with the process
- When dealing with extremely stuck pedals
- If you suspect damaged threads on the crank arm
- When installing high-end or complex pedal systems
Conclusion
Removing bike pedals is an important skill for any cyclist. With the right tools and techniques, it’s a task most people can handle at home. Remember to use the correct wrench, pay attention to thread direction, and apply appropriate torque when reinstalling. Regular maintenance and proper installation will ensure your pedals perform well and are easy to remove when needed.
FAQs About Removing and Replacing Bike Pedals
- How often should I remove and clean my bike pedals?
At least once a season, or more frequently if you ride in muddy conditions. - Can I use WD-40 to loosen stuck pedals?
While it can help, a proper penetrating oil is more effective for loosening stuck threads. - Why are bike pedals threaded differently on each side?
This design prevents pedals from loosening as you cycle. - What’s the difference between a pedal wrench and a regular wrench?
A pedal wrench has a thinner profile to fit between the pedal and crank arm. - How do I know if my pedals need to be replaced?
Look for excessive play in the spindle, visible damage, or difficulty clipping in/out (for clipless pedals). - Can I switch from platform pedals to clipless pedals easily?
Yes, as long as your new pedals are compatible with your crank arms. - What should I do if I can’t remove the pedals myself?
If you’re having difficulty, it’s best to take your bike to a professional to avoid damaging components. - Are there any risks in removing bike pedals incorrectly?
Yes, you could strip the threads, damage the crank arm, or injure yourself if the wrench slips. - How tight should I make the pedals when reinstalling them?
Use a torque wrench and follow the manufacturer’s recommendations, typically 30-40 Nm. - Can I use the same technique to remove pedals on all types of bikes?
Generally yes, but always check your bike’s manual for any specific instructions or requirements.
