As a fitness enthusiast and personal trainer with over a decade of experience, I’ve explored countless workout methods and equipment. But few have impressed me as much as the air bike. I vividly remember my first encounter with this beast of a machine. It was during a CrossFit session, and I approached it with the cockiness of someone who thought they were in decent shape. Boy, was I in for a surprise!
Within minutes of starting the workout, I was gasping for air, my legs were on fire, and my arms felt like jelly. But amid the discomfort, I felt a rush of exhilaration. I knew I had stumbled upon something special – a workout that could challenge me in ways I hadn’t experienced before.
Since that eye-opening day, I’ve incorporated air bike workouts into my routine and those of my clients. The results have been nothing short of remarkable. I’ve seen people shed stubborn pounds, dramatically improve their cardiovascular fitness, and develop lean, toned muscles across their entire body.
In this comprehensive guide, I’m excited to share nine intense air bike workout routines that I’ve developed and refined over the years. These workouts are designed to torch calories fast, challenge your limits, and propel you toward your fitness goals. Whether you’re a beginner looking to kickstart your fitness journey or an advanced athlete aiming to break through plateaus, these routines will push you to new heights.
But before we dive into the heart-pumping, sweat-inducing workouts, let’s take a closer look at what makes the air bike such a powerhouse in the world of fitness equipment.
Understanding the Air Bike and Its Benefits
What is an air bike?
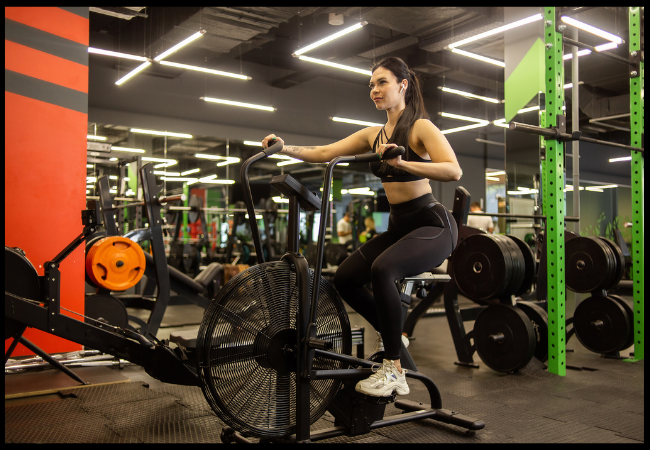
An air bike, also known as a fan bike or assault bike, is a unique piece of exercise equipment that combines the lower body workout of a traditional stationary bike with an upper body workout similar to using a cross-country ski machine. The key feature that sets it apart is its large fan at the front, which provides air resistance.
As you pedal and push/pull the handles, the fan spins, creating resistance. The faster you go, the more resistance you create. This self-regulating resistance system is what makes the air bike so versatile and challenging. It’s like having an infinite number of gears – you’re always in control of how hard you’re working.
The design of the air bike also promotes a more upright posture compared to traditional stationary bikes, which can be more comfortable for some users and allows for a full range of motion in the upper body.
Advantages of air bike workouts
Air bike workouts offer a plethora of benefits that make them an excellent choice for anyone looking to improve their fitness and burn calories efficiently. Let’s delve deeper into these advantages:
- Full-body workout: Unlike many cardio machines that primarily work your lower body, the air bike engages your arms, shoulders, and core along with your legs. This total body engagement means you’re burning more calories and building more muscle in less time.
- High-calorie burn: Due to the full-body nature of the workout, air bikes are calorie-torching machines. Depending on your weight and intensity, you can burn anywhere from 20 to 30 calories per minute. That’s up to 300 calories in a short 10-minute session!
- Low impact: Despite its high-intensity potential, the air bike is surprisingly gentle on your joints. The smooth, circular motion of pedaling and the seated position reduces stress on your knees, hips, and ankles. This makes it an excellent option for people with joint issues or those recovering from injuries.
- Customizable intensity: The beauty of the air bike lies in its adaptability. The resistance automatically adjusts based on your effort, meaning you’re always working at a level that’s challenging for you. This makes it suitable for users of all fitness levels, from beginners to elite athletes.
- HIIT-friendly: High-intensity interval Training (HIIT) is one of the most effective methods for burning fat and improving cardiovascular health. The air bike is perfect for HIIT workouts due to its ability to quickly transition between high and low intensities.
- Improved cardiovascular health: Regular air bike workouts can significantly boost your heart and lung capacity. This improved cardiovascular fitness translates to better performance in other activities and sports.
- Muscle endurance: The continuous resistance provided by the air bike helps build muscular endurance, particularly in your legs, arms, and core.
- Time-efficient: Because you’re working your entire body simultaneously, you can get an extremely effective workout in a short amount of time. This makes it perfect for busy individuals who struggle to find time for exercise.
- Variety: The air bike can be used for a wide range of workout styles, from steady-state cardio to intense interval training. This variety helps prevent boredom and keeps your workouts fresh and challenging.
Muscles targeted during air bike exercises
One of the most impressive aspects of the air bike is its ability to engage multiple muscle groups simultaneously. Here’s a more detailed breakdown of the muscles targeted during air bike exercises:
| Upper Body | Lower Body | Core |
|---|---|---|
| Biceps: Engaged during the pulling motion of the handles | Quadriceps: Primary muscles used in the pushing phase of pedaling | Rectus abdominal muscle: Engaged to maintain posture and stability |
| Triceps: Activated during the pushing motion of the handles | Hamstrings: Engaged during the upward phase of pedaling | Obliques: Worked as you stabilize your torso during the pushing and pulling motions |
| Shoulders (Deltoids): Worked throughout the arm movement | Calves: Activated throughout the pedaling motion, especially when pushing through the balls of your feet | Transverse abdominal muscle: Engaged to maintain core stability throughout the exercise |
| Chest (Pectorals): Engaged during the pushing motion | Glutes: Worked during the downward phase of pedaling, especially when you drive your legs back | Lower back: Activated to maintain proper posture during the workout |
| Back (Latissimus Dorsi): Worked during the pulling motion | Hip Flexors: Engaged as you bring your legs up during each pedal stroke | |
| Forearms: Engaged in gripping the handles throughout the workout |
This comprehensive muscle engagement is what makes the air bike such an effective tool for full-body conditioning. By targeting so many muscle groups at once, you’re not only burning a significant number of calories but also building functional strength and endurance that translates well to everyday activities and other sports.
In my experience, clients often report feeling muscles they didn’t even know they had after their first few air bike sessions. This full-body engagement is particularly effective for those looking to improve overall fitness, as it challenges your cardiovascular system while also building muscular endurance across your entire body.
Now that we understand what makes the air bike so special, let’s move on to preparing for your workout. Proper preparation is key to getting the most out of these intense routines and avoiding injury.
Preparing for Your Air Bike Workout
Proper form and technique
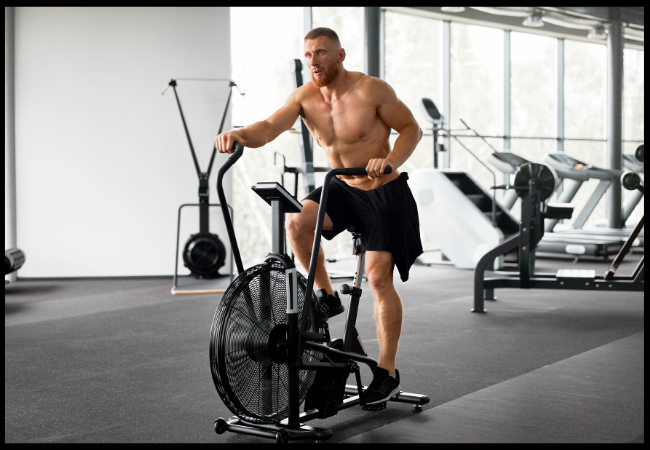
Mastering proper form and technique on the air bike is crucial for maximizing the effectiveness of your workouts and preventing injury. Here are some key points to remember, along with common mistakes to avoid:
- Seat height: Adjust the seat so that your leg is almost fully extended at the bottom of the pedal stroke, with a slight bend in the knee. Your knee should be over the ball of your foot when the pedal is at the 3 o’clock position. Common mistake: Setting the seat too low, can lead to knee strain.
- Grip: Hold the handles with a comfortable, firm grip. Avoid gripping too tightly, as this can lead to unnecessary tension in your arms and shoulders. Common mistake: Gripping the handles too loosely, can result in inefficient arm movements.
- Posture: Keep your back straight and core engaged throughout the workout. Avoid hunching over or leaning too far back. Common mistake: Slouching or arching the back, which can lead to lower back pain.
- Movement: Push and pull the handles in sync with your pedaling motion for maximum efficiency. As you push down with your right foot, your left arm should be pulling back, and vice versa. Common mistake: Moving the arms and legs out of sync, reduces efficiency and can feel awkward.
- Breathing: Maintain steady, controlled breathing to help sustain your effort. Try to breathe deeply from your diaphragm rather than taking shallow chest breaths. Common mistake: Holding your breath or breathing too rapidly, which can lead to early fatigue.
- Foot position: Keep your feet flat on the pedals, pushing through your whole foot. Avoid pointing your toes or pedaling only with your toes. Common mistake: Pedaling with just the front of the foot, reduces power and can lead to foot cramps.
- Range of motion: Use a full range of motion in both your arms and legs. Fully extend your arms and legs at the end of each stroke for maximum engagement. Common mistake: Using short, choppy movements that don’t fully engage the muscles.
Remember, it might feel a bit awkward at first, but with practice, the motion will become more natural and fluid. Don’t be afraid to start slowly and focus on form before ramping up the intensity.
Warm-up routines
A proper warm-up is essential to prepare your body for the intense workouts ahead. It helps increase your heart rate gradually, loosens up your muscles, and mentally prepares you for the challenge ahead. Here’s a more detailed warm-up routine I recommend:
- 5 minutes of light pedaling on the air bike
- Start at a very easy pace and gradually increase the intensity
- Focus on your breathing and getting comfortable with the movement
- 10 arm circles forward and backward
- Make large circles with your arms to loosen up your shoulders
- Do 5 forward circles and 5 backward circles with each arm
- 10 leg swings (each leg)
- Hold onto the air bike for balance
- Swing each leg forward and back 10 times to loosen up your hips
- 10 bodyweight squats
- Stand with feet shoulder-width apart
- Lower your body as if sitting back into a chair, keeping your chest up
- Push through your heels to stand back up
- 10 push-ups (modified if needed)
- If full push-ups are too challenging, do them with your knees on the ground
- Focus on maintaining a straight line from your head to your knees (or feet)
- 30 seconds of high knees
- Run in place, bringing your knees up toward your chest
- Pump your arms as you would while running
- 30 seconds of butt kicks
- Run in place, kicking your heels up towards your buttocks
- Keep your upper body relaxed and upright
After completing this warm-up, you should feel your heart rate elevated, your muscles looser, and your body ready for the main workout. If you still feel tight or unprepared, don’t hesitate to spend a few more minutes warming up. It’s always better to take a little extra time to warm up properly than to jump into an intense workout unprepared.
Setting up your air bike
Proper setup of your air bike is crucial for both comfort and performance. Here’s a more detailed guide to setting up your air bike:
- Check that the seat and handlebars are securely fastened
- Give them a firm shake to ensure there are no wobbling or loose parts
- Tighten any loose bolts or screws as needed
- Adjust the seat height and position for optimal comfort and efficiency
- Start by standing next to the bike and adjusting the seat to hip height
- Sit on the bike and place your feet on the pedals. At the bottom of the pedal stroke, your leg should be almost fully extended with a slight bend in the knee
- Adjust the seat forward or backward so that your knee is directly over the ball of your foot when the pedal is at the 3 o’clock position
- Make sure the bike is on a level surface to prevent wobbling during intense efforts
- If the floor is uneven, consider using a mat or shims to level the bike
- A stable bike is crucial for safety, especially during high-intensity intervals
- If your air bike has a console, familiarize yourself with its functions and set it up to display the metrics you want to track
- Common metrics include calories burned, distance covered, watts (power output), and time
- Some consoles allow you to set up interval timers, which can be helpful for structured workouts
- Make sure the console is positioned where you can easily see it during your workout
- Check the resistance fan
- Make sure there are no obstructions near the fan that could interfere with airflow
- Some air bikes allow you to adjust the fan’s resistance. If yours has this feature, set it to your preferred level
- Prepare your workout space
- Ensure you have enough room around the bike to move freely, especially if you plan to dismount for any exercises
- Keep a towel and water bottle within easy reach
- If you’re using a heart rate monitor or other fitness tracking device, make sure it’s set up and working properly
- Do a quick test ride
- Before starting your workout, take a minute to pedal at various intensities
- This will help you ensure everything is working properly and give you a chance to make any final adjustments
Remember, a properly set up air bike not only enhances your performance but also reduces the risk of discomfort or injury during your workout. Take the time to get it right, and you’ll be rewarded with more effective and enjoyable workouts.
Now that we’ve covered the basics of air bike setup and preparation, let’s dive into the heart of this guide – the nine intense air bike workout routines that will help you torch calories and take your fitness to the next level.
9 Intense Air Bike Workout Routines
Now that we’ve covered the basics, let’s dive into the nine intense air bike workout routines that will help you torch calories fast. Remember to listen to your body and adjust the intensity as needed. These workouts are designed to be challenging, but they should be tailored to your current fitness level.
High-Intensity Interval Training HIIT Blast
This workout alternates between short bursts of maximum effort and brief recovery periods. HIIT is incredibly effective for fat-burning and improving cardiovascular fitness.
- Warm-up: 5 minutes at a moderate pace
- 8 rounds of:
- 20 seconds of all-out effort (give it everything you’ve got!)
- 40 seconds easy recovery pace (catch your breath, but keep moving)
- Cool-down: 5 minutes at a light pace
Total time: 20 minutes
Pro tip: During the 20-second all-out efforts, aim to maintain the same intensity throughout all 8 rounds. It’s tempting to go all-out in the first few rounds and then taper off, but try to pace yourself so you can maintain consistent intensity.
Endurance Builder
This workout focuses on maintaining a steady, challenging pace for an extended period. It’s great for building cardiovascular endurance and mental toughness.
- Warm-up: 5 minutes at a light pace
- 30 minutes at a challenging but sustainable pace (aim for 7-8 out of 10 on the effort scale)
- Cool-down: 5 minutes at a light pace
Total time: 40 minutes
Pro tip: Break the 30-minute main segment into smaller chunks mentally. For example, focus on maintaining your pace for 5 minutes at a time. This can make the workout feel more manageable.
Tabata-Style Air Bike Challenge
This high-intensity workout follows the Tabata protocol of 20 seconds of work followed by 10 seconds of rest. It’s brutally effective for improving both aerobic and anaerobic capacity.
- Warm-up: 5 minutes at a moderate pace
- 8 rounds of:
- 20 seconds maximum effort
- 10 seconds complete rest
- Rest for 1 minute
- Repeat the 8-round sequence 3 more times
- Cool-down: 5 minutes at a light pace
Total time: 30 minutes
Pro tip: The key to Tabata is giving 100% during the work intervals. Don’t hold back – these should be all-out efforts!
Upper Body Focus Workout
This workout emphasizes the upper body by incorporating arm-only intervals. It’s great for building arm and shoulder endurance.
- Warm-up: 5 minutes at a moderate pace
- 5 rounds of:
- 1-minute full-body pedaling at a challenging pace
- 30 seconds arms-only (feet on foot pegs)
- 30 seconds recovery
- Cool-down: 5 minutes at a light pace
Total time: 20 minutes
Pro tip: During the arms-only segments, focus on maintaining a steady rhythm. It’s easy to start fast and then slow down, but try to keep a consistent pace throughout the 30 seconds.
Lower Body Burner
This workout targets the lower body with leg-focused intervals. It’s excellent for building leg strength and endurance.
- Warm-up: 5 minutes at a moderate pace
- 6 rounds of:
- 45 seconds legs-only pedaling (hands off the handles)
- 15 seconds all-out effort (full-body)
- 30 seconds recovery
- Cool-down: 5 minutes at a light pace
Total time: 22 minutes
Pro tip: During the legs-only intervals, focus on engaging your core to maintain stability. Without the arm handles for support, you’ll need to use your core muscles more to keep your upper body steady.
Full-Body Fat Torcher
This workout combines various interval lengths to keep your body guessing and maximize calorie burn. It’s a great way to prevent plateaus and keep your workouts challenging.
- Warm-up: 5 minutes at a moderate pace
- 3 rounds of:
- 1 minute at 70% effort
- 45 seconds at 80% effort
- 30 seconds at 90% effort
- 15 seconds at 100% effort
- 1-minute recovery
- Cool-down: 5 minutes at a light pace
Total time: 25 minutes
Pro tip: Use the console to track your calories or distance during each interval. Try to maintain or increase your output as the intervals get shorter and more intense.
Time Trial Challenge
This workout simulates a time trial, pushing you to maintain a high intensity for a set duration. It’s excellent for building mental toughness and improving your ability to sustain effort over time.
- Warm-up: 5 minutes at a moderate pace
- 15-minute time trial: Maintain the highest pace you can sustain for the entire duration
- Cool-down: 5 minutes at a light pace
Total time: 25 minutes
Pro tip: Pace yourself! It’s tempting to start too fast, but try to find a challenging pace that you can maintain for the full 15 minutes. If you have energy left in the last few minutes, push harder to finish strong.
Pyramid Interval Workout
This workout gradually increases the work interval length before decreasing it again. It’s a great way to challenge yourself with longer high-intensity efforts while still including some shorter, all-out bursts.
- Warm-up: 5 minutes at a moderate pace
- Pyramid sequence:
- 30 seconds high intensity, 30 seconds recovery
- 45 seconds high intensity, 45 seconds recovery
- 60 seconds high intensity, 60 seconds recovery
- 90 seconds high intensity, 90 seconds recovery
- 60 seconds high intensity, 60 seconds recovery
- 45 seconds high intensity, 45 seconds recovery
- 30 seconds high intensity, 30 seconds recovery
- Cool-down: 5 minutes at a light pace
Total time: 25 minutes
Pro tip: As the intervals get longer, resist the urge to decrease your intensity. Try to maintain the same level of effort throughout, regardless of the interval length.
Active Recovery Day Routine
This lower-intensity workout is perfect for active recovery days or when you need a lighter session. It helps improve blood flow, aids in recovery and maintains your fitness without overstressing your body.
- 5 minutes at a light pace
- 20 minutes at a moderate, conversational pace
- 5 minutes at a light pace
Total time: 30 minutes
Pro tip: Use this workout as an opportunity to focus on your form. Since you’re not pushing for maximum intensity, you can concentrate on perfecting your technique and ensuring you’re moving efficiently on the bike.
Tips for Maximizing Calorie Burn on the Air Bike

To get the most out of your air bike workouts and maximize calorie burn, consider the following tips:
Proper nutrition for optimal results
Fueling your body correctly is crucial for intense workouts and recovery. Here are some more detailed nutrition tips to support your air bike routines:
- Pre-workout:
- Consume a small meal containing easily digestible carbohydrates and protein about 1-2 hours before your workout.
- Good options include a banana with peanut butter, Greek yogurt with berries, or a small bowl of oatmeal with nuts.
- If you’re working out early in the morning, a small snack like a piece of fruit or an energy gel about 15-30 minutes before can provide quick energy.
- During workout:
- For sessions longer than 60 minutes, consider sipping on a sports drink to replenish electrolytes and maintain energy levels.
- For shorter, high-intensity sessions, water is usually sufficient.
- Post-workout:
- Eat a balanced meal with protein and carbohydrates within 30 minutes of finishing your workout to support muscle recovery and replenish glycogen stores.
- Aim for a 3:1 ratio of carbs to protein. Good options include a protein shake with fruit, chicken with brown rice and vegetables, or a tuna sandwich on whole grain bread.
- Don’t forget to rehydrate! Drink water or an electrolyte drink to replace fluids lost through sweat.
- General nutrition tips:
- Stay hydrated throughout the day, not just during workouts.
- Focus on whole, nutrient-dense foods to fuel your body properly.
- Don’t skimp on healthy fats – they’re important for hormone production and overall health.
- Consider tracking your macronutrients (protein, carbs, and fats) to ensure you’re getting the right balance for your goals.
Incorporating air bike workouts into your fitness routine
To see the best results, aim to include air bike workouts in your fitness routine 2-3 times per week. Here’s a sample weekly schedule that incorporates air bike workouts with other forms of exercise:
- Monday: Upper Body Focus Workout (Air Bike) + upper body strength training
- Tuesday: Lower body strength training or yoga
- Wednesday: HIIT Blast (Air Bike)
- Thursday: Yoga or flexibility work
- Friday: Full-Body Fat Torcher (Air Bike) + core workout
- Saturday: Outdoor activity (hiking, cycling, swimming) or rest
- Sunday: Active Recovery Day Routine (Air Bike) or light jog
Remember to listen to your body and adjust the schedule as needed to avoid overtraining. It’s also important to progressively increase the intensity and duration of your workouts over time to continue seeing improvements.
Tracking progress and adjusting intensity
To ensure continued progress and avoid plateaus, it’s important to track your workouts and gradually increase the intensity. Here are some more detailed ways to do this:
- Keep a workout log:
- Record the details of each workout, including duration, intensity, and how you felt.
- Note any personal records or achievements.
- Track your recovery – how do you feel the day after each workout?
- Use the bike’s console:
- Track metrics like calories burned, distance covered, and average power output.
- Many consoles allow you to save your workout data – use this feature to compare your performance over time.
- Set goals:
- Establish specific, measurable goals for your air bike workouts and work towards them.
- Examples could be increasing your calories burned in a 20-minute session, or improving your average watts over a 5-minute time trial.
- Set both short-term (weekly or monthly) and long-term (3-6 months) goals.
- Progressive overload:
- Gradually increase the duration or intensity of your workouts over time.
- This could mean adding an extra round to your HIIT workout, increasing the resistance, or pushing for a higher wattage during steady-state sessions.
- Aim for small, consistent improvements rather than dramatic jumps in intensity.
- Use heart rate training:
- If you have a heart rate monitor, use it to ensure you’re working at the right intensity for your goals.
- For fat burning, aim to work at 70-80% of your maximum heart rate.
- For improving cardiovascular fitness, push into the 80-90% range during high-intensity intervals.
- Periodize your training:
- Divide your training into phases, each with a specific focus (e.g., building endurance, increasing power, fat loss).
- This approach can help prevent plateaus and keep your workouts challenging and effective.
- Regular assessments:
- Every 4-6 weeks, perform a fitness assessment to track your progress.
- This could be a 20-minute time trial, seeing how many calories you can burn in 10 minutes, or testing your maximum watts for a 30-second sprint.
- Use these assessments to adjust your training as needed.
Remember, progress isn’t always linear. Some days you’ll feel stronger than others, and that’s perfectly normal. The key is to stay consistent with your workouts and trust the process.
Conclusion
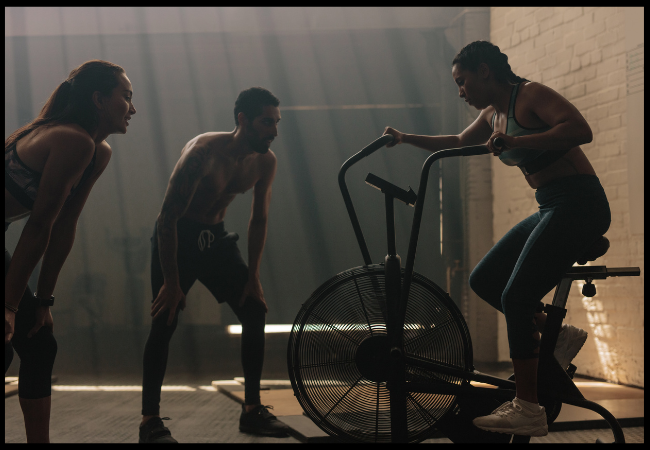
Air bike workouts are an incredibly effective way to torch calories and improve your overall fitness. The nine intense routines outlined in this article provide a variety of challenges that will keep your workouts fresh and exciting. From HIIT blasts to endurance builders, there’s a workout here for every goal and fitness level.
As someone who has personally experienced the transformative power of air bike workouts, I can attest to their effectiveness. I’ve seen clients make remarkable progress in their fitness journeys, shedding pounds, building lean muscle, and dramatically improving their cardiovascular health. I’ve also pushed my limits further than I thought possible, achieving new levels of endurance and power that have translated into improved performance in other areas of my fitness routine.
The air bike has become an indispensable tool in my fitness arsenal, and I’m confident it can do the same for you. Its versatility, efficiency, and ability to provide a full-body workout make it a standout piece of equipment in any gym or home workout space.
Remember, the key to success with these workouts – or any fitness program – is consistency and gradual progression. Start at a level that challenges you but is manageable, and slowly increase the intensity over time. Listen to your body, fuel it properly, and give it time to recover between intense sessions.
Don’t be discouraged if the workouts feel incredibly challenging at first. That’s part of the beauty of the air bike – it meets you at your current fitness level and continues to challenge you as you get stronger. Embrace the challenge, push through the discomfort, and you’ll be amazed at what your body can achieve.
So, hop on that air bike, embrace the challenge, and get ready to torch those calories. Your fitter, stronger self is just a few pedal strokes away! Remember, every workout is an opportunity to improve, to push your limits just a little bit further. Enjoy the journey, celebrate your progress, and most importantly, have fun with these workouts.
Now, are you ready to start your air bike journey? Which workout are you excited to try first? Whatever you choose, know that you’re taking a powerful step towards improving your fitness and overall health. Let’s get pedaling!
